Transporter131 138 Posted March 18, 2018 Zdravo svima, interesuje me da li je neko stavljao diskove umesto dobosa na Marei 1.9jtd Weekend? Sta je sve potrebno da se promeni i ukoliko ste menjali, koje diskove ste stavljali? Unapred hvala na odgovorima, pozdrav Quote Share this post Link to post Share on other sites
darkman14 5900 Posted March 18, 2018 Imao u planu ali nisam menjao jer bih najviše dobio na izgledu. Kupiš ceo most od benzinca, prošle godine mi je Peđa iz inđije tražio 50 evra za sve komplet most sa diskovima i pločicama, mislim od 2.0 benzinca. Mislim da je bitno da ima senzore za ABS. Quote Share this post Link to post Share on other sites
Trofeo 115 Posted March 18, 2018 Ja sam odustao od tog projekta.A pedju sam zvao par puta nije imao za novi tip sa abs-om. stari tip kao sto Andreja kaze 50e. Nije zajebano za staviti koliko je zajebano naci za novi tip. Quote Share this post Link to post Share on other sites
Martin 799 Posted March 18, 2018 Ne mora most da se menja, mogu se ubaciti diskovi, pa čaki od Libre (ali onda je cena preko 50e, info od majstora jer sam hteo dizmenjam sve to prošlog leta). Smatram da ovakva konverzija ima smisla, što zbog izgleda, ali i efikasnijih kočnica a i pre svega što je sve dostupno i može se isprati kada se pere auto a ne da se uzgaja rđa i korozija pa da ti se sve unutar doboša raspadne (kao meni što se desilo prošlog leta, a pakne prešle samo 25000 km). Quote Share this post Link to post Share on other sites
darkman14 5900 Posted March 18, 2018 Može i to, ali je jednostavnije ceo most. Nema prepravki u odnosu na stavljanje diskova samo. Makar je meni tako rečeno. A i ima nešto na UK Fiat forumu. Koliko sam gledao, mora se praviti prihvat (adapter) za disk kao i za kačenje klešta. Ne znam da li može samo da se skine doboš i stavi disk. A naravno, iako se menja ceo most, verovatno je potrebno zameniti diskove, pločice, pregledati klešta... Ni most nije 50 evra samo mislim da mi je računica bila na nekih 120-130 evra za sve računajući zamenu mosta, diskove i pločice, bez reparacije klešta. Quote Share this post Link to post Share on other sites
Martin 799 Posted March 19, 2018 Tako je - ne moze ispod 100€ ako će sve biti urađeno po PS! Quote Share this post Link to post Share on other sites
darkman14 5900 Posted March 19, 2018 (edited) @Martin Ako imaš negde uputstvo/snimak sa diskovima sa libre, pusti link Edited March 19, 2018 by andreja.micovic Quote Share this post Link to post Share on other sites
Transporter131 138 Posted March 20, 2018 On 3/18/2018 at 9:19 PM, Martin said: Ne mora most da se menja, mogu se ubaciti diskovi, pa čaki od Libre (ali onda je cena preko 50e, info od majstora jer sam hteo dizmenjam sve to prošlog leta). Smatram da ovakva konverzija ima smisla, što zbog izgleda, ali i efikasnijih kočnica a i pre svega što je sve dostupno i može se isprati kada se pere auto a ne da se uzgaja rđa i korozija pa da ti se sve unutar doboša raspadne (kao meni što se desilo prošlog leta, a pakne prešle samo 25000 km). Nisi na kraju stavio diskove? Našao sam diskove, klješta, creva, sajle ručne po relativno povoljnoj ceni. Da li bi još nešto trebalo da se menja? Jel možeš da mi daš kontakt telefon tog majstora, da ga pozovem i pitam, pošto sam planirao da to sve zamenim sad za vikend. On 3/18/2018 at 11:22 PM, andreja.micovic said: Koliko sam gledao, mora se praviti prihvat (adapter) za disk kao i za kačenje klešta. Ne znam da li može samo da se skine doboš i stavi disk. Kako izgleda, kakav adapter, daj još neke detalje Quote Share this post Link to post Share on other sites
darkman14 5900 Posted March 20, 2018 ja sam gledao ovde: https://www.fiatforum.com/cinquecento-seicento-guides/172993-rear-disc-brake-conversion-ii.html jeste da je seicento u pitanju, ali ne verujem da je princip drugačiji. Na adapter sam mislio na ovo, što verujem da ima fabrički, samo se skine u kompletu sa mosta (a vidi se da je neki naš tamo pisao vidim da je nik nmrmak): Quote - Mounting plates You will need a way to mount the calipers to the car. So, you should go out and buy a uno turbo mounting plate. If you can't find it (my case ), you'll have to make your own. I'll include the "technical" drawing here for reference. You can use it to order water-cut plates like i did or go for some other cutting technique. Mine were 6mm thick and work allright. Sorry for the non-english version, but "Specifikacija otvora" means drilling positions, and "Poluprecnik" means radius. That was pretty much all that the water-cut guys needed from me A evo i ceo postupak: Quote The procedure outlined: Jack up the car, put it (the side you'll be working on) on an axle stand or something similar, remove the wheel. undo the 2 bolts keeping the drum in place (and keep them, you'll need them later), remove the drum. Under it you'll see the drum brake mechanism and the hub. Undo the hub nut (you'll need a 30mm hub tool for that) - these are very tight so pay attention, you don't want to injure yourself...make sure the axle stand is stable enough (i used large chunks of wood so my support was rock solid, but if you think your axle stand won't be up to the task, try loosening the nut a little with the car on the ground and the wheel on and finish the job with the car on the stand). Many people recommend that you always use new hub nuts. You could reuse it on your own responsibility, but you should definitely reuse the small washer that sits between it and the hub. Remove the hub carefully. Best way is to reach with your hand behind it and find where it sits on the small axle thing and push on that so you don't damage the bearings. Remove 3 of the 4 bolts that bolt the drum mechanism to the car and keep them (you will reuse them in about 10 minutes). Drum, hub and 3 bolts removed: Quote Remove the handbrake cable from the drum mechanism. What i did in my case was remove the part of the brake line that is on the rear suspension arm. Disconnect it and remove the last bolt keeping the drum mechanism, then remove the drum mechanism from the car. Drum mechanism and slave brake cylinder removed: Quote (Warning: brake fluid leaks from the system at this time, you might want to catch it into some sort of a container and dispose of it when you're done). Bolt on the mounting plate where the drum mechanism used to be using the 4 bolts you just recovered. Mounting plate bolted: Quote Put some grease on the short axle thingy and put the UT hub on. You should ask someone more experienced if you've never replaced a hub before. Re-use the washer you removed when you removed your old hub and tighten it using a new hub nut. It will take a lot of force to tighten it, again, consult someone more experienced to tell you just how tight to go. New hub on: Quote When the new hub is on, put the new disk over the hub and secure it using the two smaller screws you recovered when you removed the drum. (TIP: before you screw in the smaller two screws, first screw in 2 wheel bolts to help you center the disk. Tighten them real good, screw in those 2 smaller screws, then undo the wheel bolts.) Now for the hydraulics. (you can do this part first so the brake fluid doesn't leak all the time after removing the drum) Since i had brake hoses with two male connectors, i had to first screw in the hose into the caliper, and then screw the other part into the rest of the brake system, while rotating the caliper (the caliper was actually hanging off the hose in the process). Pic: Quote After you do that, make sure the piston is in the fully retracted position. If it isn't, use a piston compressing tool (which you don't have, so you'll have to lightly hammer it in with the aid of an extension like i did or use a crimp ). Put in the brake pads and then position the caliper on the disk, over the mounting plate, and screw in the upper bolt so that the caliper can rotate around it (don't tighten it completely). Bleed the system with the calipers rotated at such an angle so that the bleeding valve sits at the highest position. Bolt in the lower screw after you do it. Use washers if the screws are too long and contact the disk on the other side. Quote As far as the handbrake goes: my handbrake cable was too short (some people suggest that you can in fact use the cable already on the car, but i'd go and buy a cable that's 5-10cm longer than the factory made one). The temporary solution i had was to cut a part of the metal cable guide and that did the trick. You should cut the hoops on the cable ends so they can pass through the mounting hole in the caliper and run them to the handbrake mechanism on the caliper. You might need to play with the handbrake adjustment screw, but i think there is already a guide on how to that. Re-fit the wheel, lower the car to the ground and test the brakes at low speeds first, and see that your handbrake works before going for a street test. Use common sense and be very careful. If possible, find a long stretch of asphalt with no traffic on it (i used a deserted road where there's nobody around) and bed in the brakes, and test them with high speed braking after the disks and pads are bed in. You want to be sure you can stop the car from 100kmph before going any faster than that. Be careful, the car might oversteer if you upgraded only the rear brakes (but it didn't in my case). Ako budeš menjao, dokumentuj sve. Ima nas koji bi se igrali 2 1 neshaoct, horvat and Trofeo reacted to this Quote Share this post Link to post Share on other sites
Transporter131 138 Posted March 31, 2018 E, pa kolege forumasi, operacija je uspesno izvrsena! Stavljeni su diskovi od 2.0 20V, zamenjeno sve sto treba i prvi utisak je da auto barem 30% bolje, tj konkretnije koci. Ranije se kocnica nekako odugovlacila, nije bilo to to, sada, malo jace stisnem, kuca! Samo, sada su mi ove 15ice male i zatvorene... Pozdrav! Quote Share this post Link to post Share on other sites
Martin 799 Posted March 31, 2018 @Transporter131 Samo si skinuo donose i nabacio diskove, jel tako? Quote Share this post Link to post Share on other sites
Transporter131 138 Posted March 31, 2018 Da, upravo tako, nisam menjao most. Samo su skinuti dobosi, stavljeni diskovi, zamenjene sajle rucne i to je to, 3h zezanja. Quote Share this post Link to post Share on other sites
darkman14 5900 Posted March 31, 2018 Gde si našao diskove i klješta? Koliko je sve izašlo? Quote Share this post Link to post Share on other sites
Transporter131 138 Posted April 1, 2018 12 hours ago, Transporter131 said: Da, upravo tako, nisam menjao most. Samo su skinuti dobosi, stavljeni diskovi, zamenjene sajle rucne i to je to, 3h zezanja. Dodatak,anker platna,distanc sajbna,crevo i cev. Quote Share this post Link to post Share on other sites
Martin 799 Posted April 1, 2018 Diskovi mogu i novi da se ubace (jer nisu samoventilirajući), kao i pločice. Ovo ostalo sve može po otpadima da se nađe. Quote Share this post Link to post Share on other sites
Transporter131 138 Posted April 1, 2018 7 hours ago, andreja.micovic said: Gde si našao diskove i klješta? Koliko je sve izašlo? Hm,u Smederevu kod Saleta (062 663 076), posto smo jako dobri drugari dobio sam specijalnu cenu.Racunajte nove sajle i plocice,i ako kljesta nisu sjajna bar promenu gumica.I diskovi ako su losi i to je trosak.Diskovi i kljesta koje sam uzeo bez greske,tako da tu nisam imao troskove,sajle u kit komercu oko 2500 i plocice original 2200. 1 Martin reacted to this Quote Share this post Link to post Share on other sites
Trofeo 115 Posted April 1, 2018 @Transporter131 Jel imas ti abs na autu? Quote Share this post Link to post Share on other sites
Transporter131 138 Posted April 1, 2018 2 hours ago, Trofeo said: @Transporter131 Jel imas ti abs na autu? Da Quote Share this post Link to post Share on other sites
Trofeo 115 Posted April 1, 2018 (edited) 4 hours ago, Transporter131 said: Da Znaci nista bukvalno nisi prepravljao osim navedenog? Jesi testirao kocenje kako hvataju u odnosu na prednje? Bilo je reci treba menjati kocioni da bi to sve bilo kako treba da ne bi dolazilo da hvataju u isto vreme itd jer zadnje treba da hvataju kasnije u udnosu na prednje... Hocu da stavim diskove pa bih to da uradim kako treba ili nikako... gledao sam nove diskove 1600 din su komad,plocice isto tako nesto... Sajle moraju druge> sajle koliko sam video leva-desna oko 3000. samo mi pojasni za te platne i distanc posto se ne razumem,cemu sluze?gde si ih uzimao i koliko si platio?? Edited April 1, 2018 by Trofeo Quote Share this post Link to post Share on other sites
Transporter131 138 Posted April 2, 2018 Nista nije prepravljano,glavni kocioni je isti i sve ostalo je isto.Koci normaalno,prednji pa zadnji,abs radi normalno.Distanc sajbna se nalazi izmedju lezaja i anker platne,kad budes kupovao sve sto skine uzmi,sem lezaja.Zato sto je tvoj lezaj verovatno bolji.Ako je tvoj auto euro 3 i delovi koje uzimas moraju da budu isto euro 3,postoji razlika u citacu abs-a. Ako ti jos nesto nije jasno pitaj. Quote Share this post Link to post Share on other sites
Trofeo 115 Posted April 2, 2018 3 hours ago, Transporter131 said: Nista nije prepravljano,glavni kocioni je isti i sve ostalo je isto.Koci normaalno,prednji pa zadnji,abs radi normalno.Distanc sajbna se nalazi izmedju lezaja i anker platne,kad budes kupovao sve sto skine uzmi,sem lezaja.Zato sto je tvoj lezaj verovatno bolji.Ako je tvoj auto euro 3 i delovi koje uzimas moraju da budu isto euro 3,postoji razlika u citacu abs-a. Ako ti jos nesto nije jasno pitaj. Lezaji su mi u dobrom stanju necu ih menjati.Jeste euro 3 i i ima abs. Hvala ti puno kolega,javljam ako gde zaskripi. Quote Share this post Link to post Share on other sites
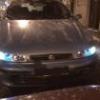
Transporter131 138 Posted April 6, 2018 Sada diskovi mogu da dodju do izrazaja 390.000km 4 IgorBG, Trofeo, Martin and 1 other reacted to this Quote Share this post Link to post Share on other sites
darkman14 5900 Posted October 4, 2018 (edited) @Transporter131 @Martin Obojica ste relativno skorije radili ove konverzije. Idem skoro u nabavku nekih delova pa sam mislio ako mi povoljno ispadne komplet zadnjih klešta od Maree ili Lybre da kupim da stavim i ja diskove pozadi. Da proverim šta sve treba: klešta, crevo, sajla za ručnu i prihvat/nosač klešta? Šta je sa ležajem? Ostaje isti? I ova distance šajbna između ležaja i diska. Edited October 4, 2018 by andreja.micovic Dodato za šajbnu Quote Share this post Link to post Share on other sites